Student / Member Management Overview
Table of Contents
- What is a Member?
- Active vs Inactive Memberships
- Adding Members
- Viewing and Editing your Members
- Exporting Rosters
What is a Member?
In CutTime, students consist of a few different records:
- A Student is a record that has a name, date of birth, and student ID
- A student has a Program Membership that connects them to your CutTime account
- Each program membership is part of a Season
- Students can have more than one program membership at a time, which allows students to access multiple CutTime accounts using the same login. For example, a single student that's in both Band and Choir may have two program memberships at the same time.
- A student may have an Identity, which contains their email and/or cell phone number
When managing students in your CutTime account, you will typically be interacting with a program membership. For this reason, we will refer to students and Members somewhat interchangeably.
Active vs Inactive Memberships
Program Memberships can be either Active or Inactive.
- Active memberships refer to members that are active participants in your current season. These members will appear by default in your Members page and in all other places where you might interact with your members.
- Inactive memberships refer to members that may have been active in your current season but are no longer active. These members will not appear in your default filters and will not receive communications from CutTime, but you can still view and reactivate them from your Members page. If this student has permanently left the program, you can elect not to establish a program membership for this student in the next season when you do your end-of-year wrap up.
Adding Members
Note: If you are planning to add more than a couple members at a time, we strongly recommend importing them rather than adding them individually.
Importing / Adding Members in bulk
See the Student Import Overview help document for a complete walkthrough.
Adding Members individually
- Navigate to the Members page from the sidebar on the left side of your screen
- Click the "Add Student" button from the top right side of the Members page
- Enter in the student's information (first name, student ID, and grade level are required)
- When adding a new member, you'll typically want them to be "Active"
- Click the "Add Student" button
After you add a member individually, you will need to add their contact information separately. See below for more information.
Viewing and Editing your Members
Navigating the Members page
Navigate to the Members page by clicking the link in the sidebar on the left side of your screen. The default listing on this page contains all active members in your current season. You can see the number of active members next to "Member Listing."

At the top of the page you will find various search filters that you can use to narrow down your search. These filters can be combined if necessary - for example, I want to see all of the 12th Graders that play Flute in the Marching Band:
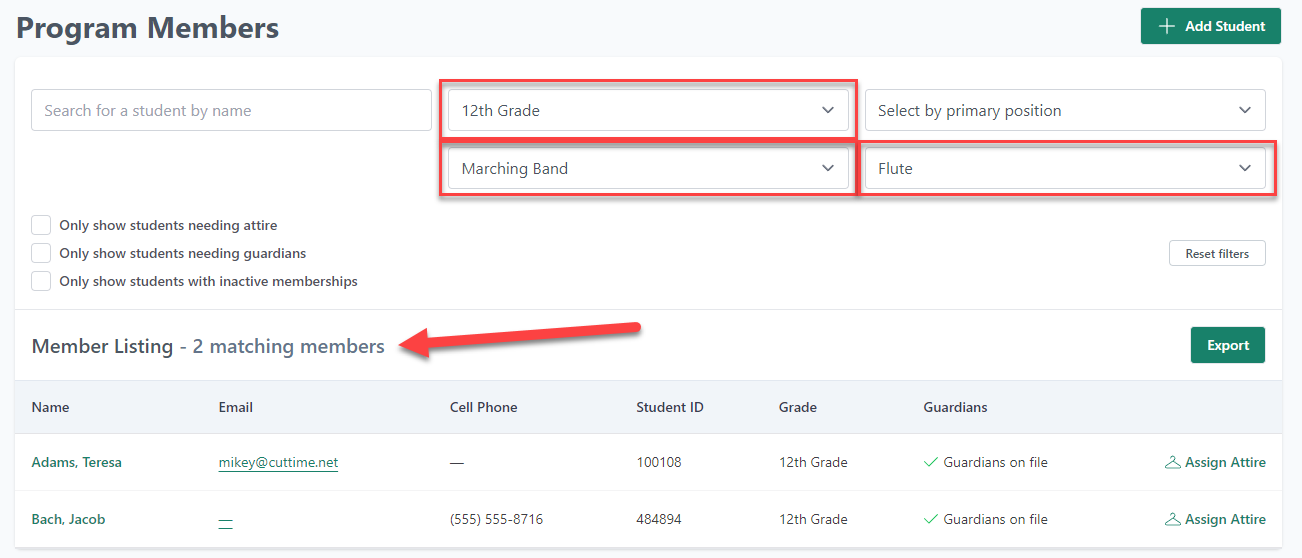
Note that the Member Listing number will change to reflect the number of Members that match the filters you applied.
Viewing Membership Details
To access a student's Membership Details page, click on their name in the table. On the Membership Details page you will see various tables containing a member's data:
- Basic information (name, student ID, date of birth, grade, primary position)
- Contact status (email, cell phone, last login)
- Groups and positions within each group
- Attire assignments
- Music Library assignments
- Guardians
- Costs
- Payments
- Documents
On this page, you can also perform several tasks for a member:
- Send a welcome message
- Add or edit contact information (see below)
- End attire and music library assignments
- Add or edit guardians
- Add or edit costs
- Add, edit, or delete payments
Editing a Member
From a student's Membership Details page, you can click the "Edit" button to adjust any of their basic information as needed. This is where you can deactivate or reactivate the student's program membership.
To update a student's contact information, however, you must go to the "Contact status" table on this page.
To add contact information to a member that does not have any:
- Click "Set up contact"
- Enter in either an email address or a cell phone number and click "Search"
If that contact information does not already exist in the database: Create a new contact and optionally send a welcome message to the member.

If that contact information does already exist in the database: See the other students and program memberships that have already been connected to this contact information. If the other students you see here appear to be the same student you're working with, click "Assign to contact" to connect your student with this contact information. If the other students you see here appear to be different from the student you're working with, review the contact information you entered for accuracy. Note that Clicking "Assign to contact" means that all of the students on this page will be able to log in and access the dashboard for your current student.


To update or remove a member's contact information:
- Click "Edit contact"
- To update contact information: Add, update, or remove the email address or cell phone listed and click "Save"
- To remove all contact information: Click "Disconnect from this contact"
Exporting Rosters
On the upper right side of the Members table is a green "Export" button. This button will generate and download an Excel spreadsheet of anything you have filtered in this table. If you don't have any filters applied, it will generate a spreadsheet of all active members of your program. However, if you would like to export a specific roster, you can simply choose a Group from the dropdown filter at the top of the page before exporting. With this filter applied, the spreadsheet will contain only the members that have been assigned to that group.
